Open the configuration from the settings menu. Click on “Misc”-menu and select Custom forms. Create a new form by clicking “Add”.
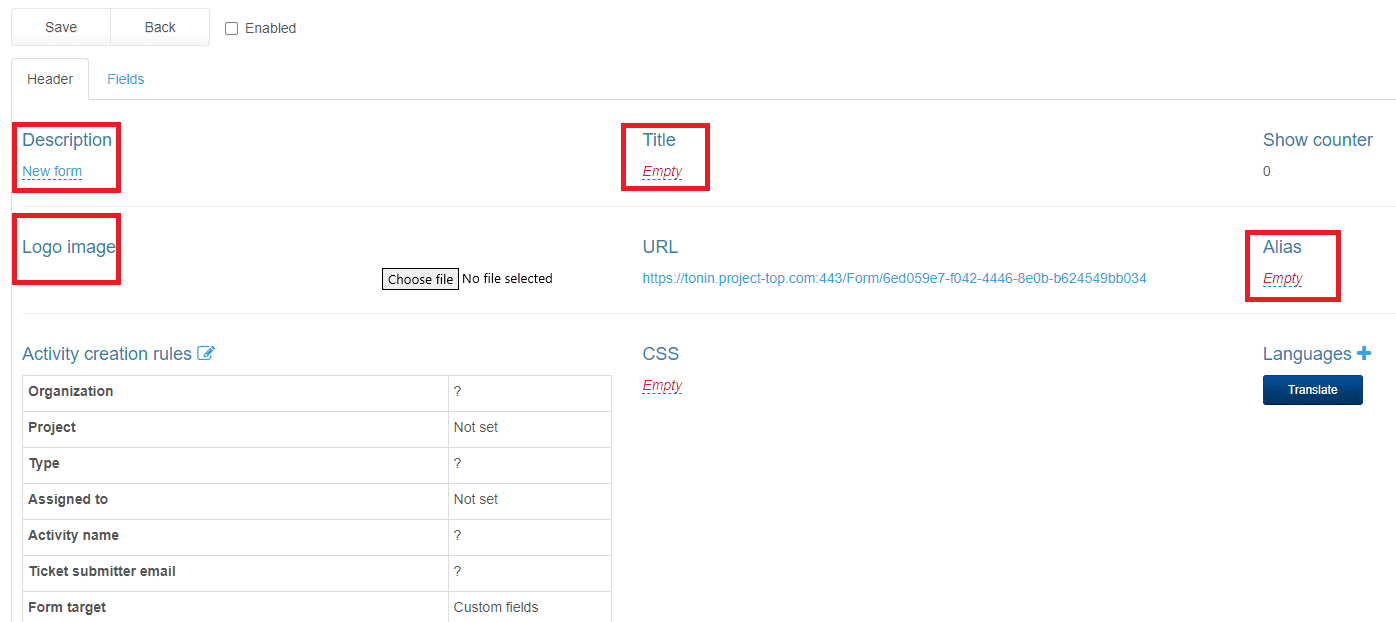
Add a title, description and a name to the form. If necessary, you can also set a logo.
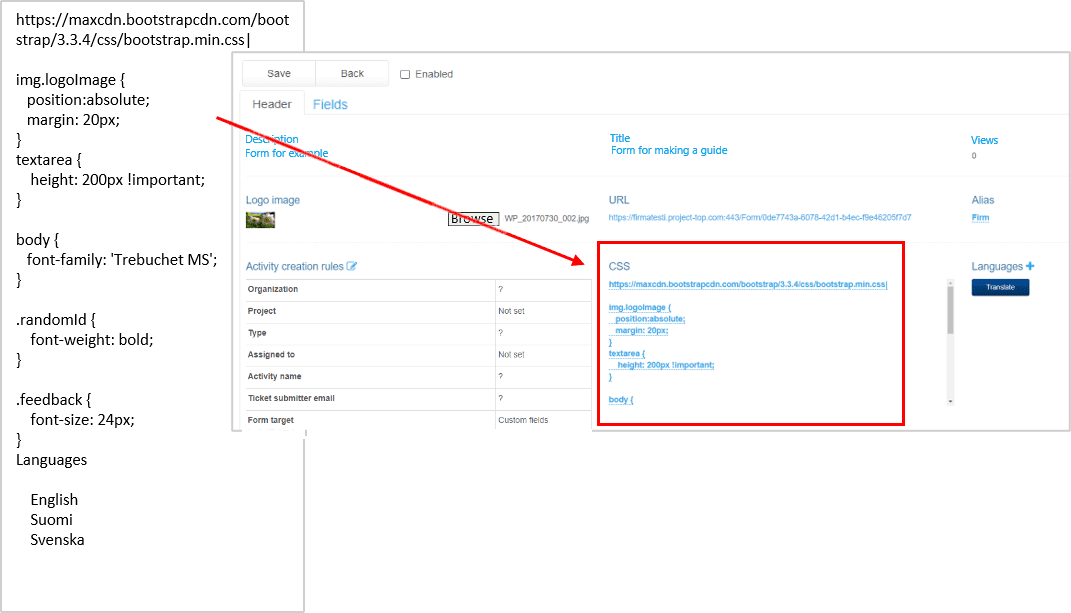
Add CSS and define settings for the texts. Save in between.
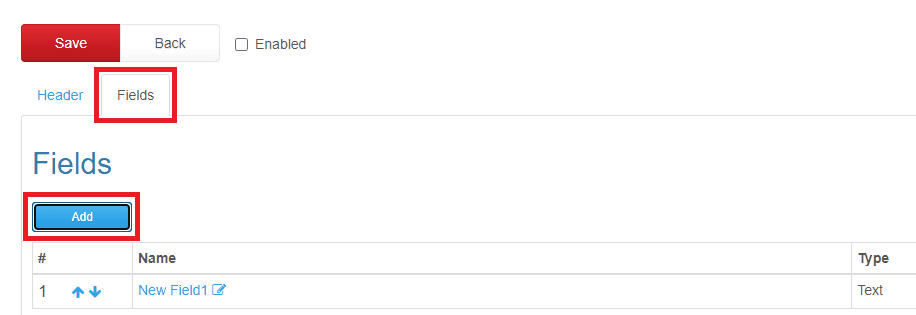
Add the form fields on the second tab.
Add the required number of rows and edit the field name and format to correct.
Add the required number of rows and edit the field name and format to correct.
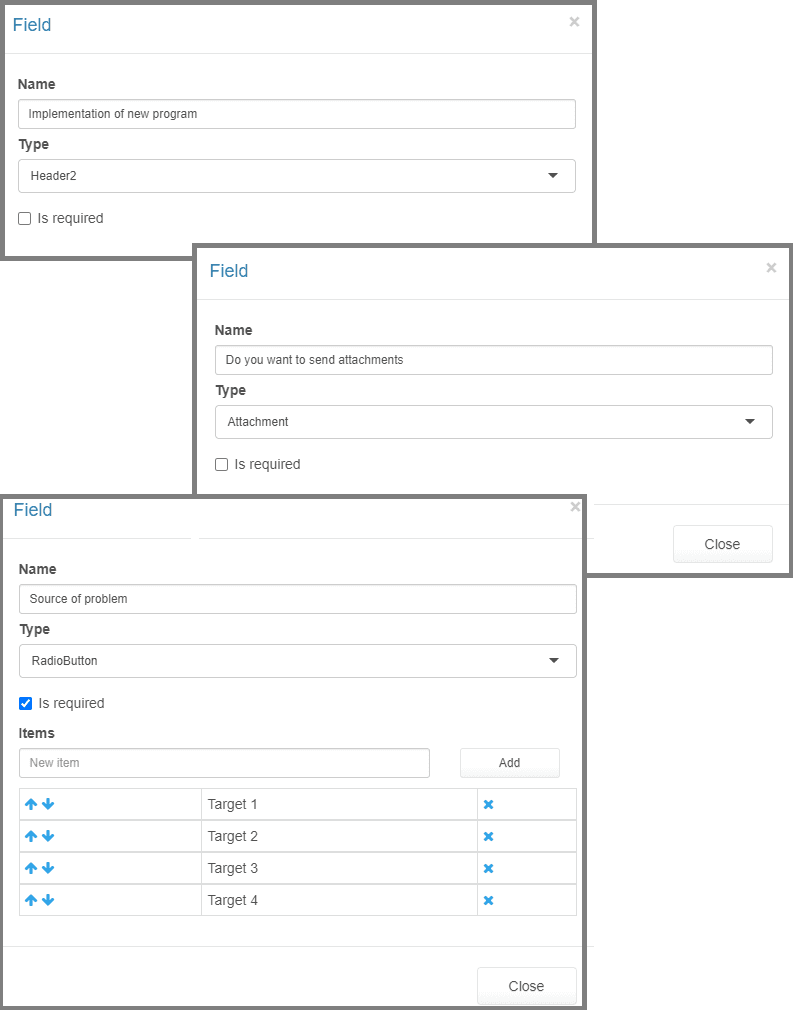
For example, you can make header fields, text fields for one or more lines, check boxes,
and attachment save fields.
You can set the fields as mandatory by clicking “Is required”.
Save and return to title information tab.
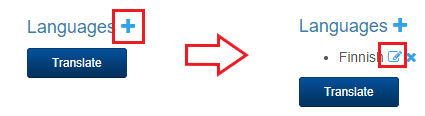
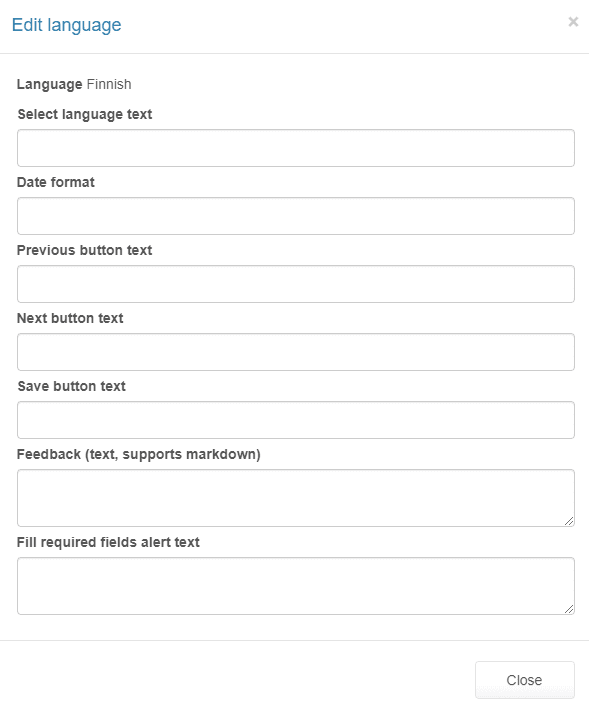
Add languages and make translations.
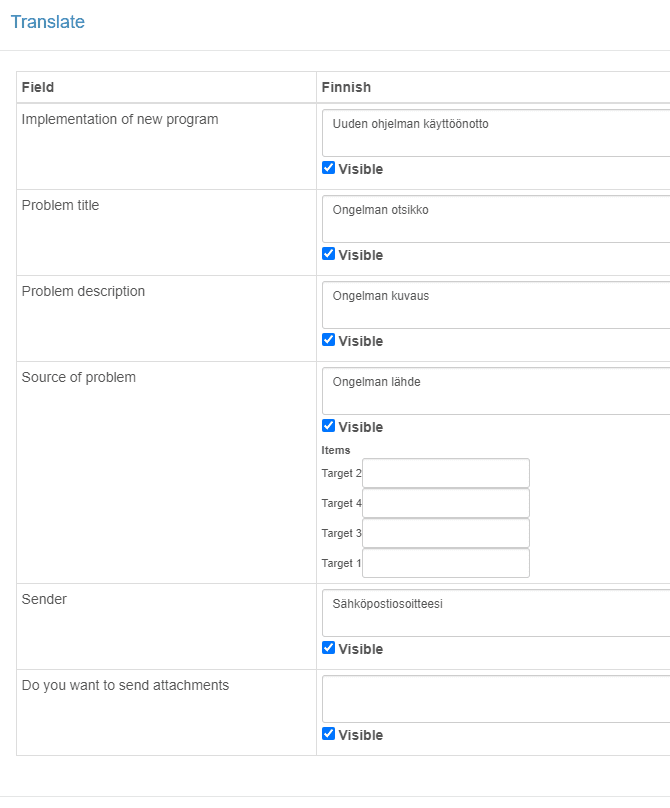
If necessary, also complete the field translations with the “Translate” button.
In this view, you can also replace the field names you want to appear on the form.
Save in between.
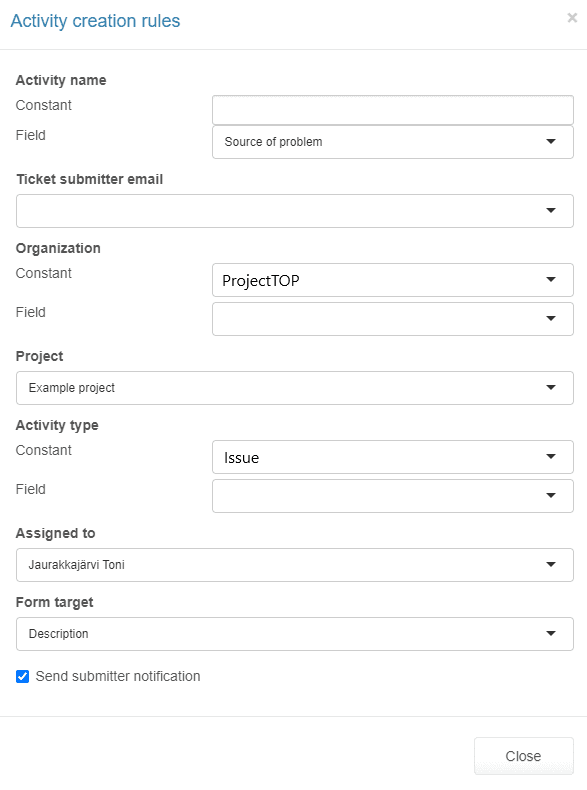
Go set the activity settings.
Go set the activity settings.
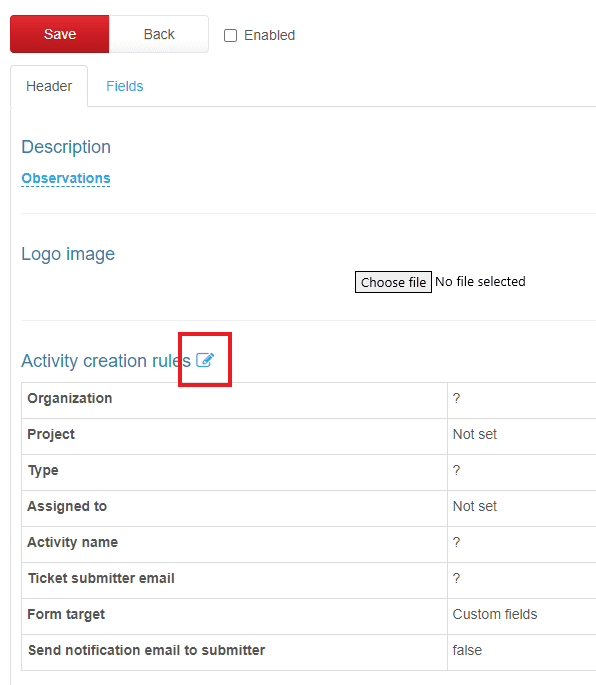
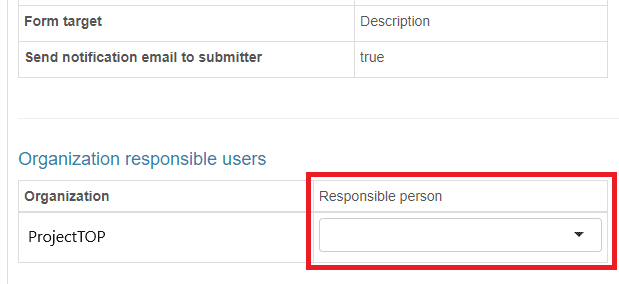
You can assign a responsible person by organization.
If no responsible person has been set, the activity goes to the responsible person set on the “Activity creation rules” page.
If no responsible person has been set, the activity goes to the responsible person set on the “Activity creation rules” page.
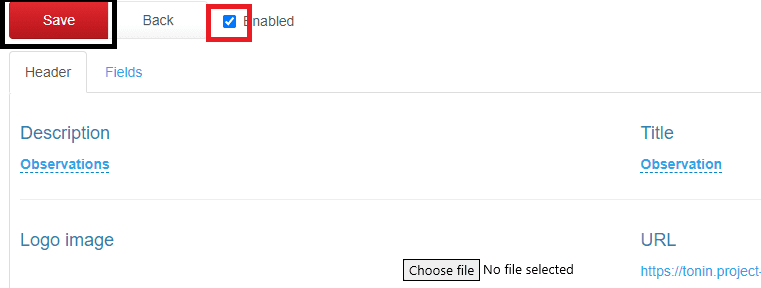
Save and enable the form.
You can check the form from the link.
You can check the form from the link.