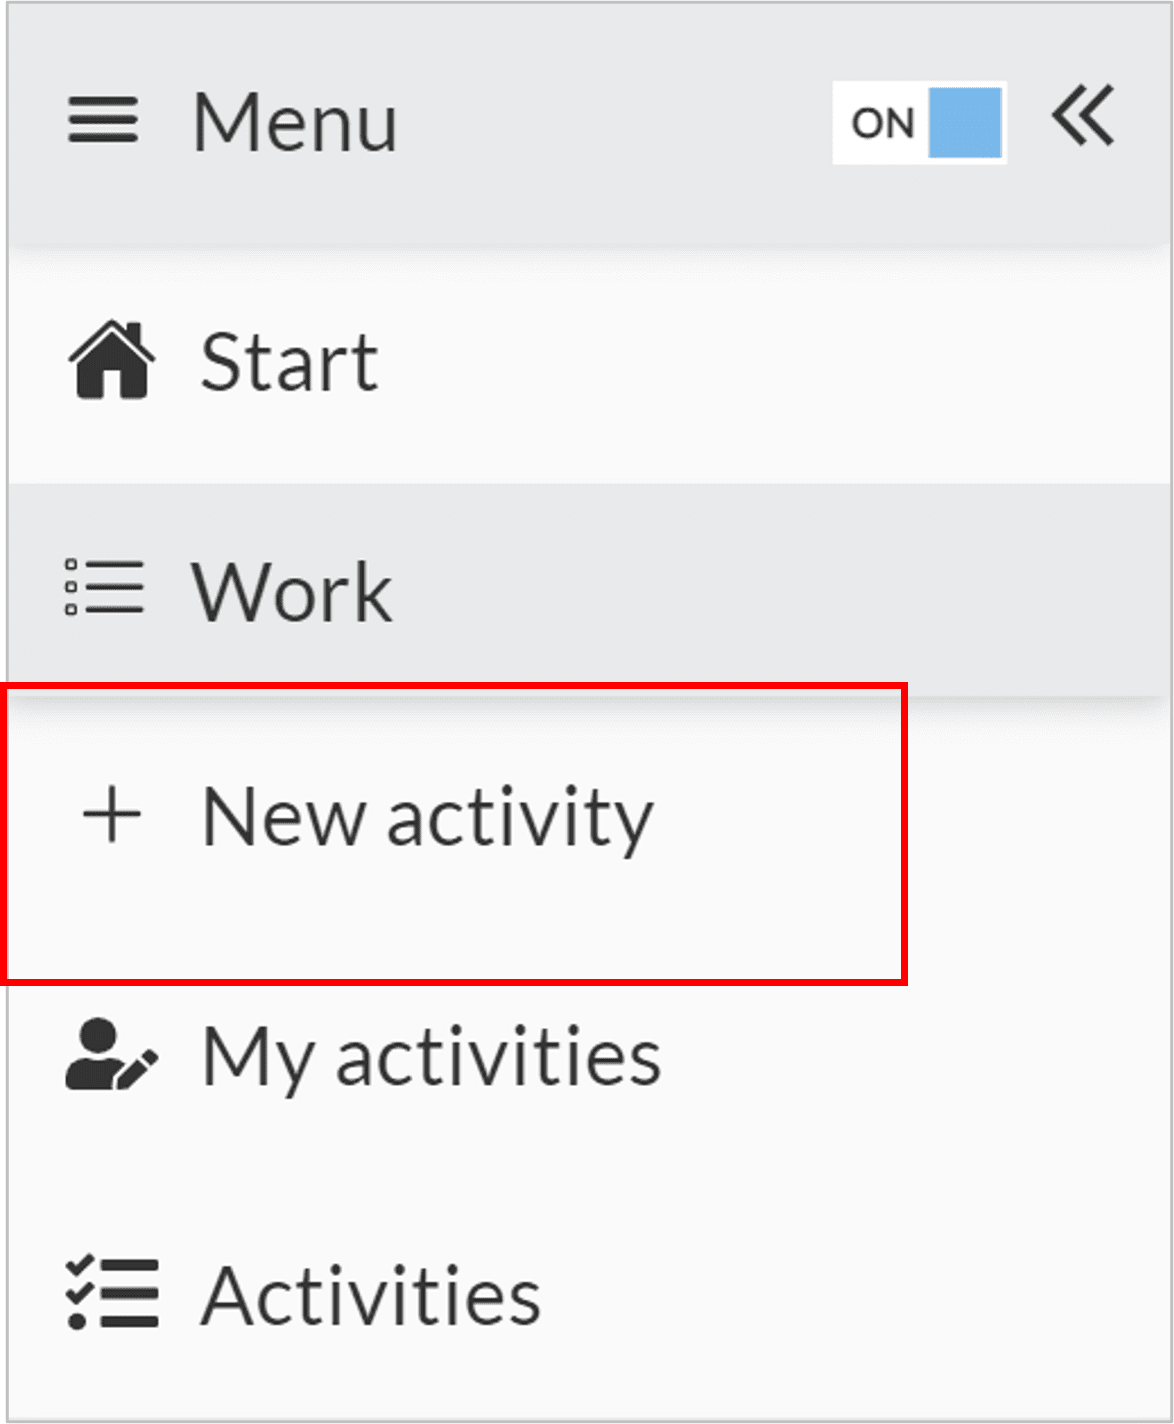
Start creating a test case by selecting “New Activity” from the menu.
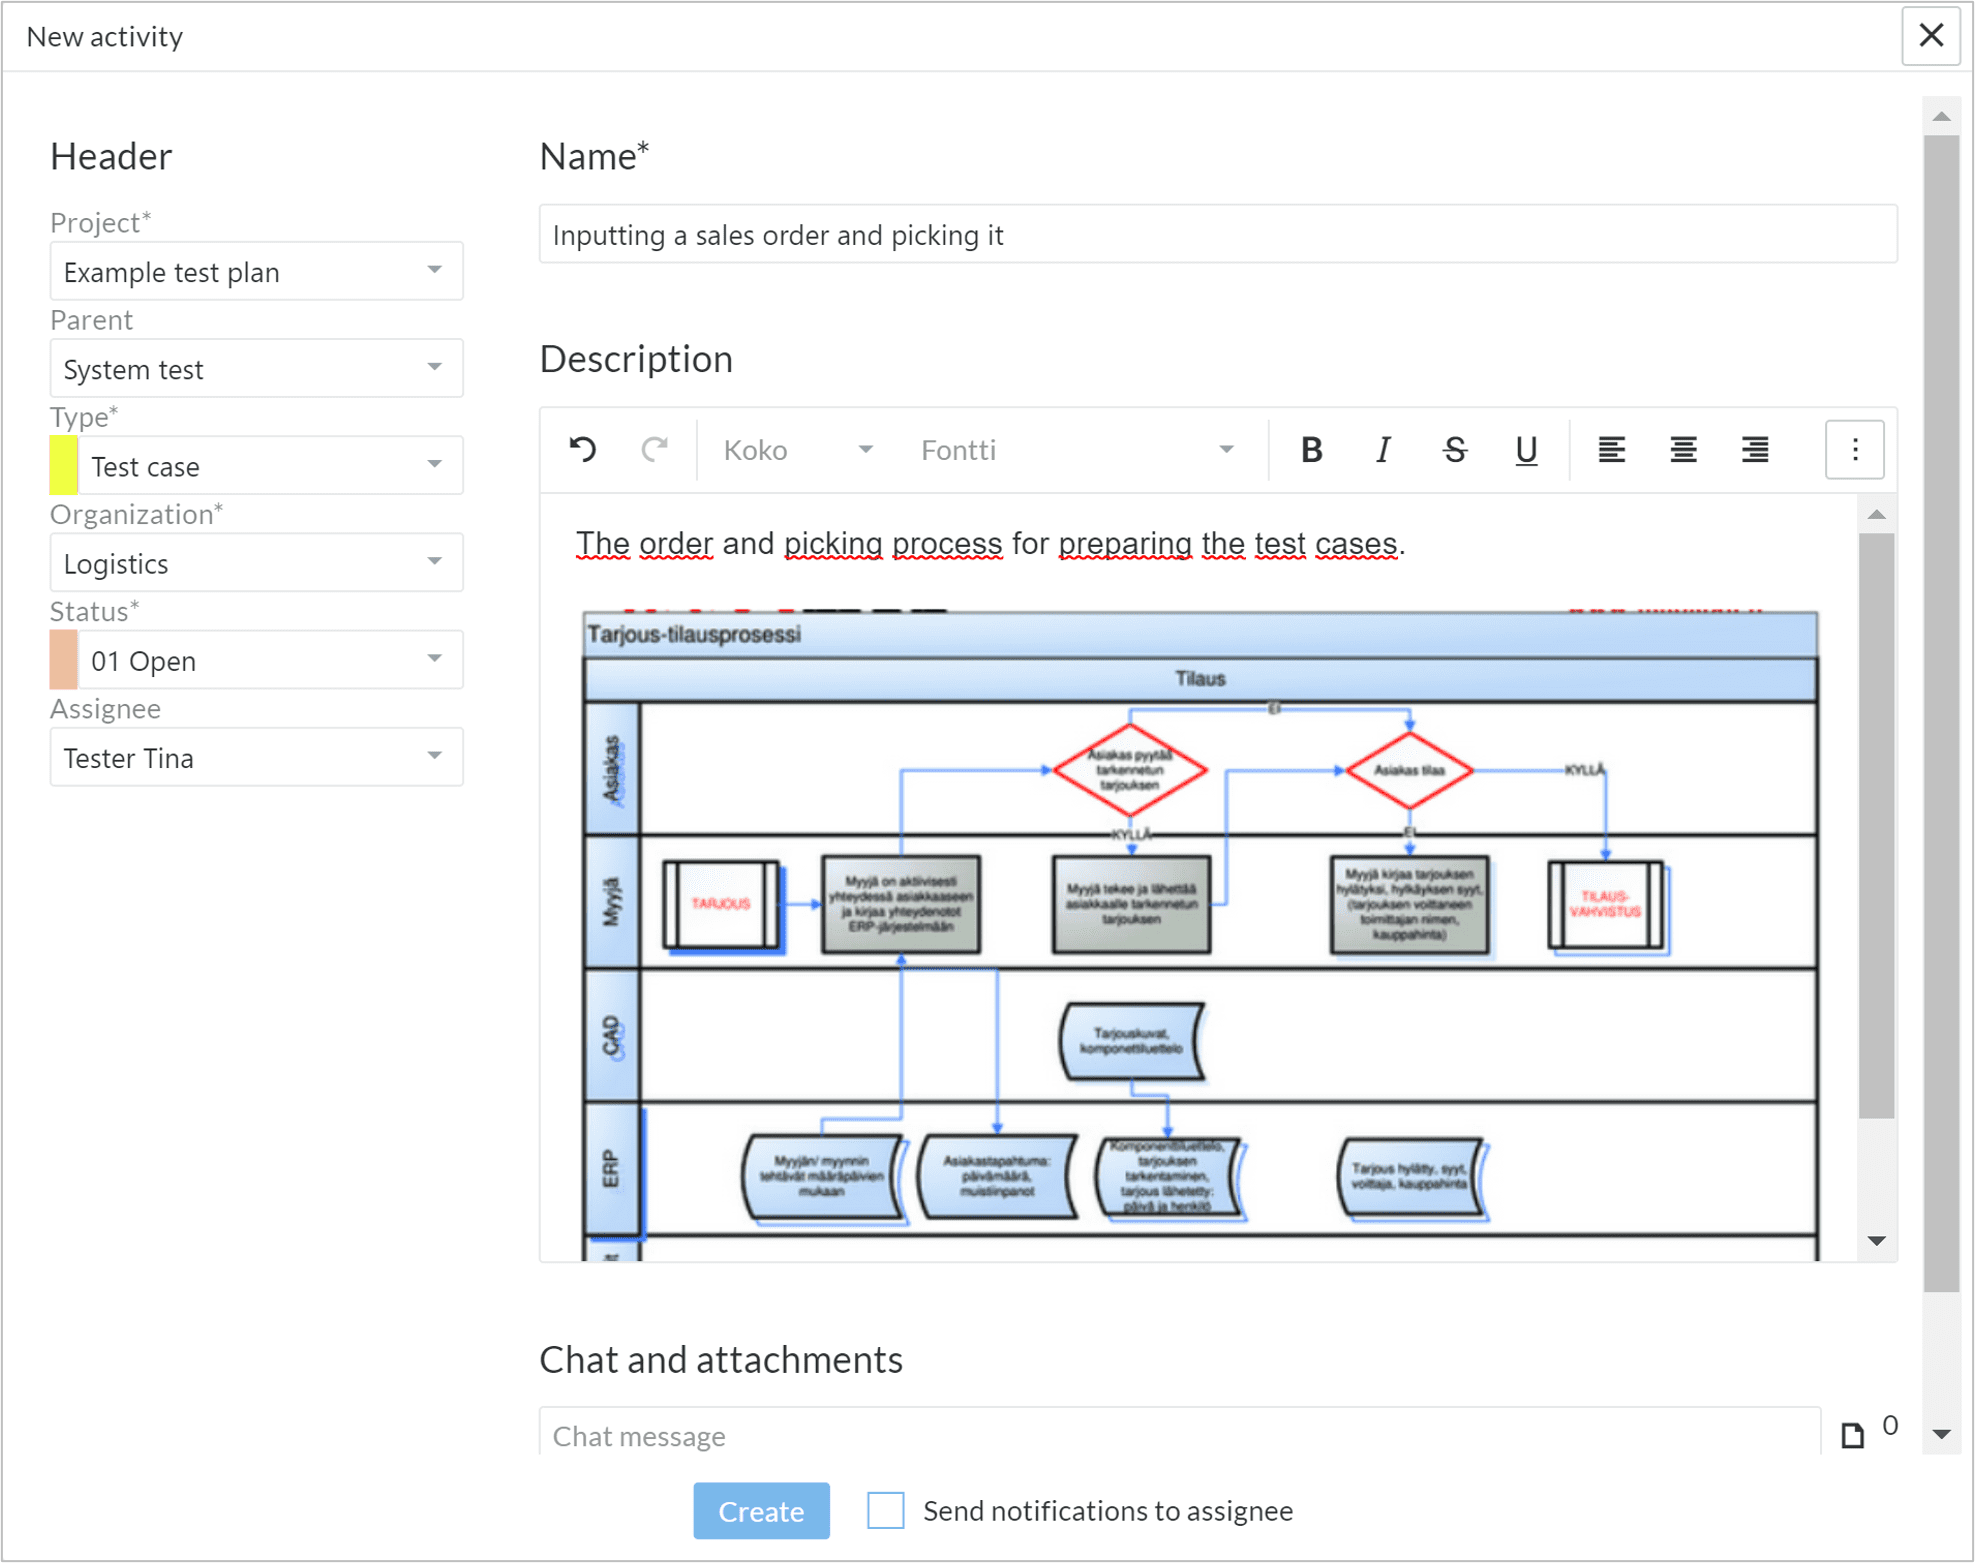
Fill in the information on the form that appears:
- Give the test case a precise and descriptive name.
- Select a type.
- Select a project.
- Select an organization.
- Select a status.
- Provide a clear description of what is being tested.
The other fields are optional. Click “Create”. Then you can open the activity by clicking “View.”
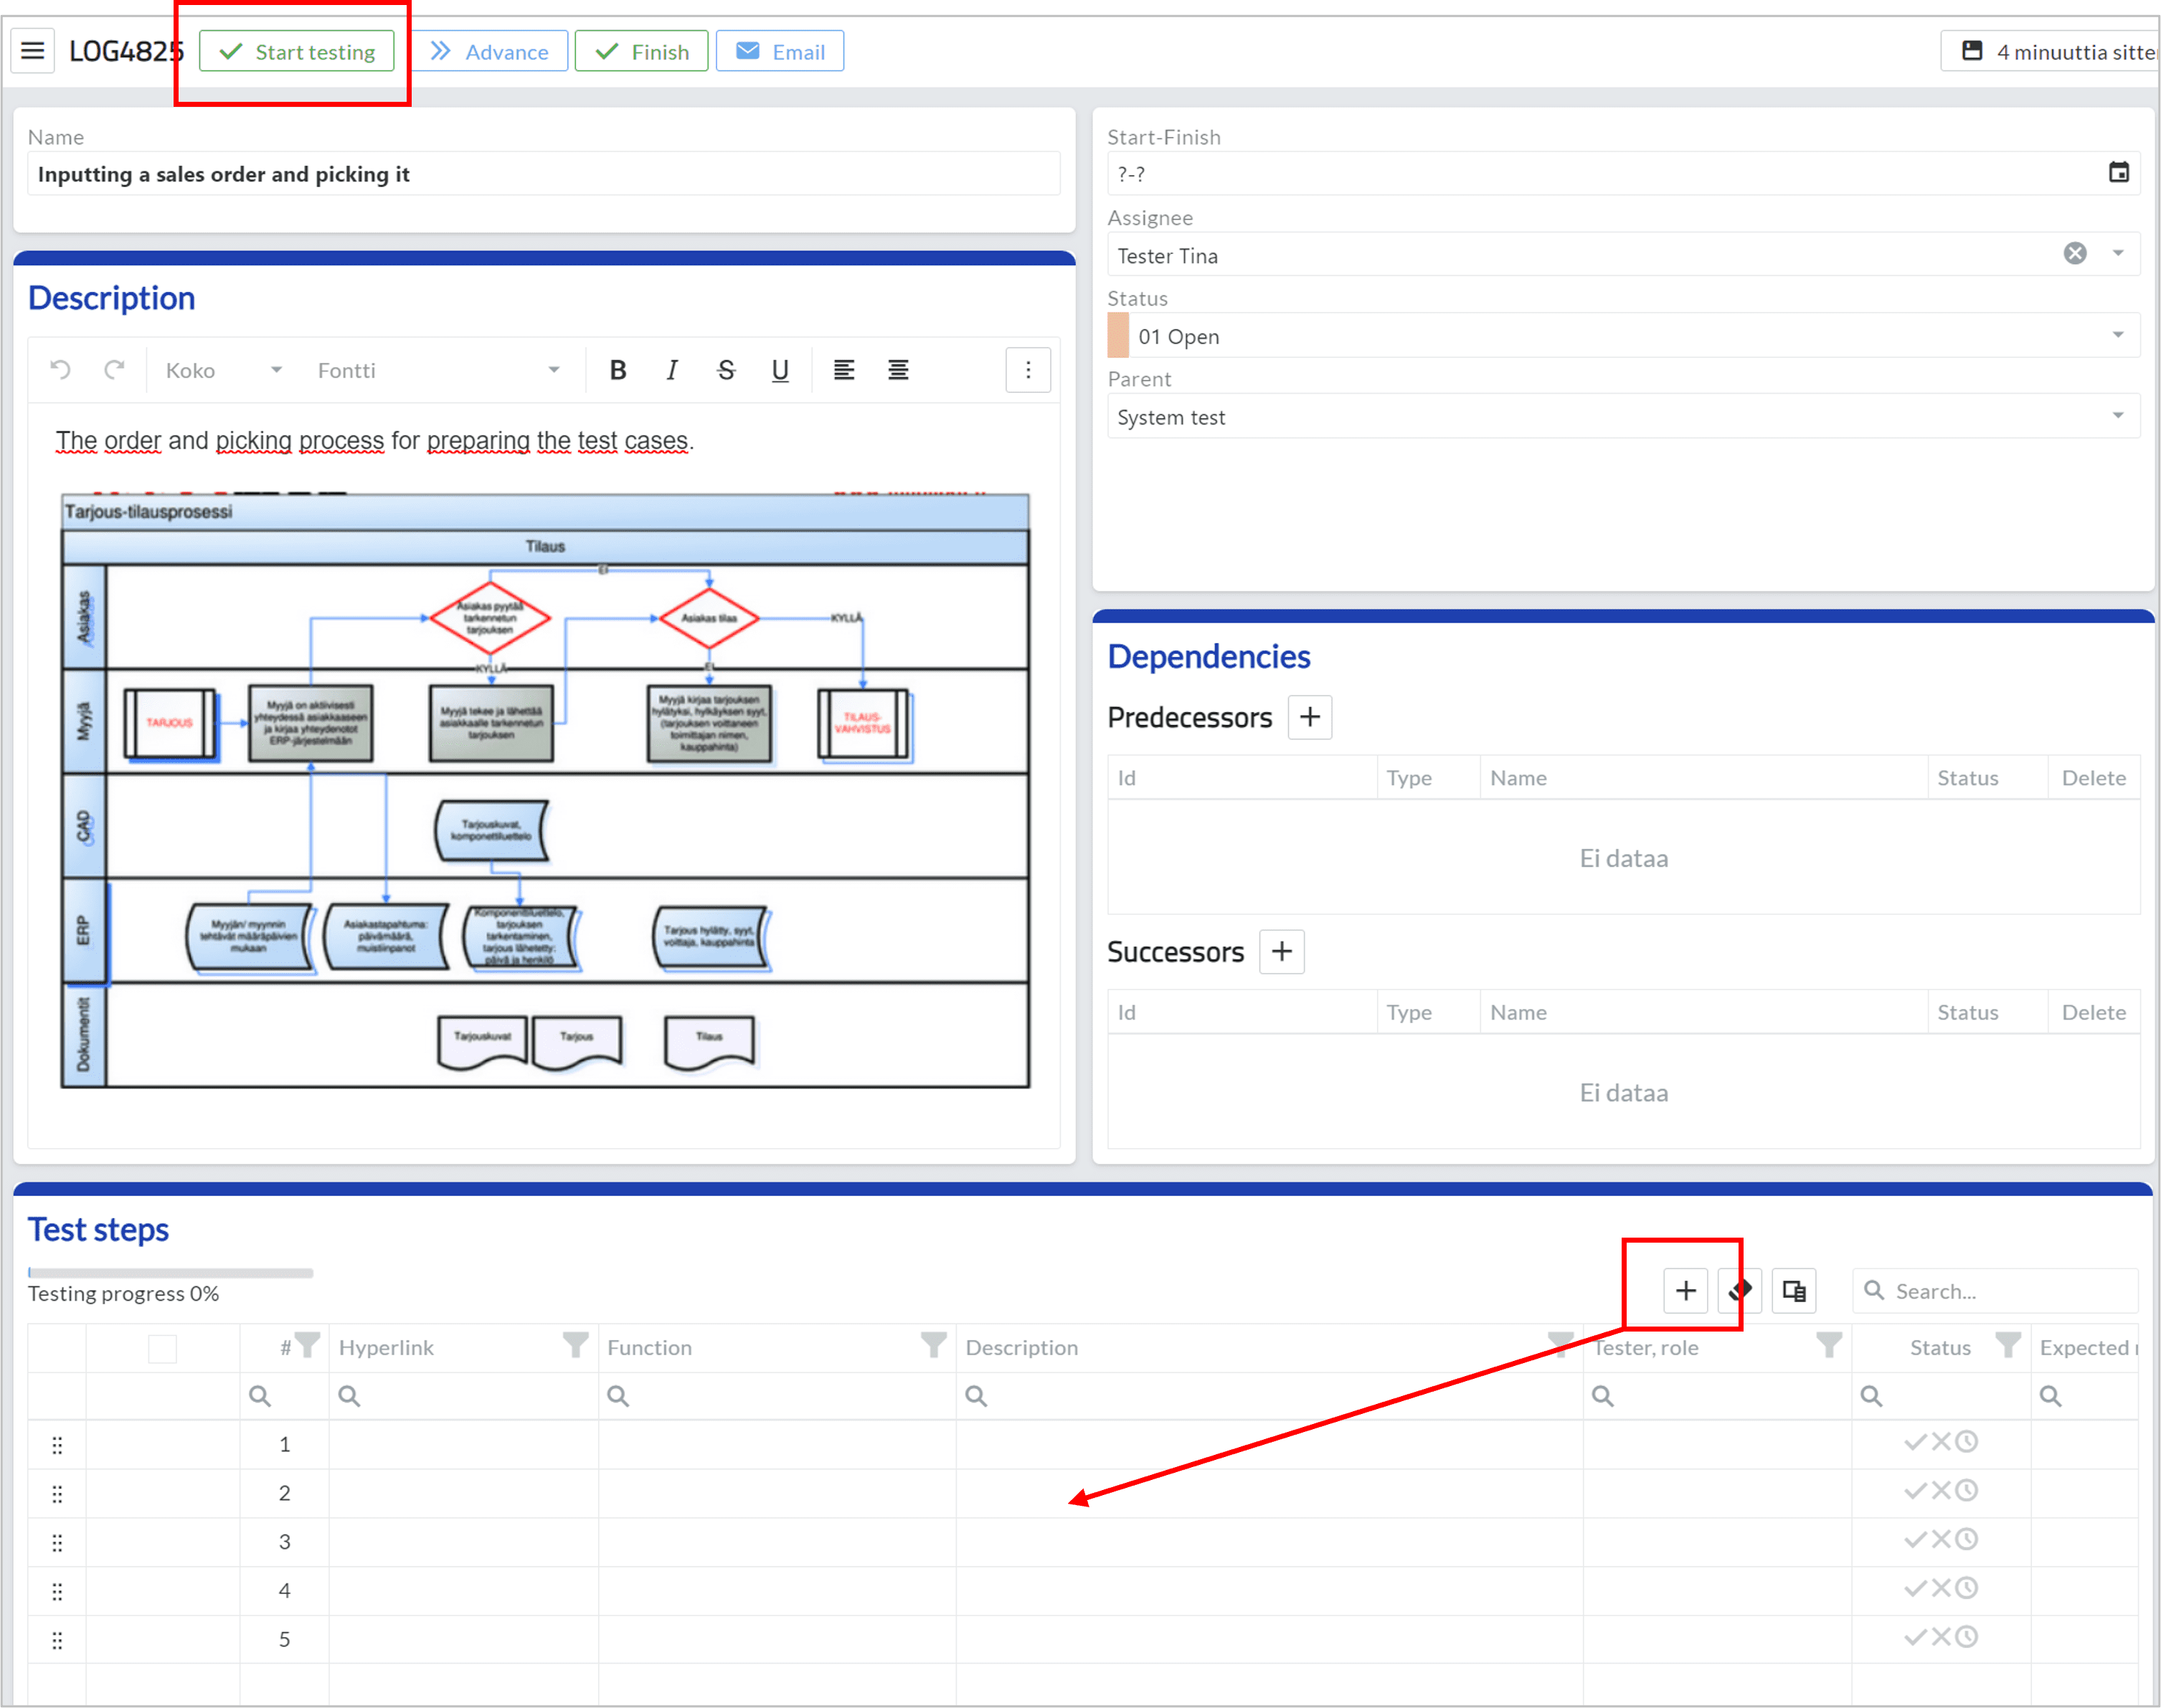
Begin writing the steps of the test case by clicking the plus sign above the test rows.
You can also edit test rows in the testing view by clicking Start Testing.
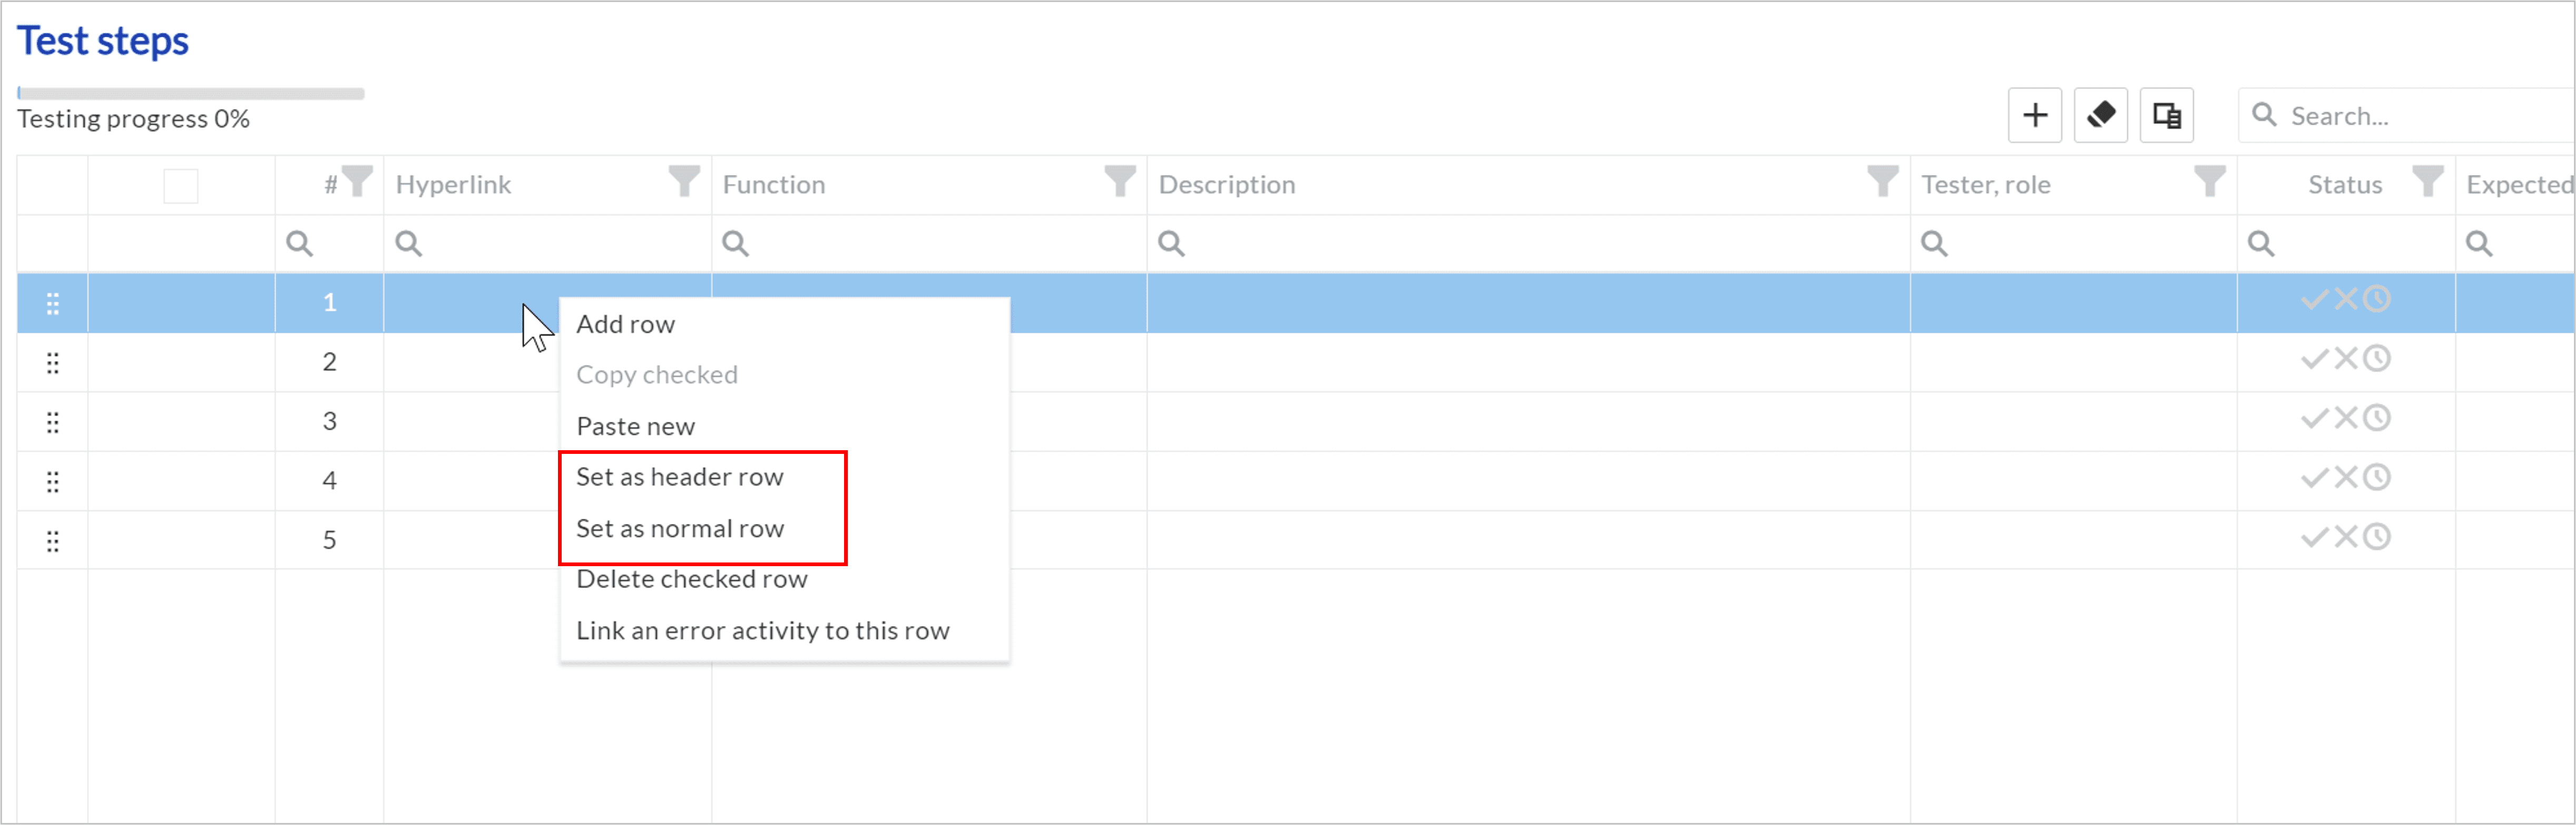
You can set and remove header rows by right-clicking on a test row and selecting an appropriate option from the menu.
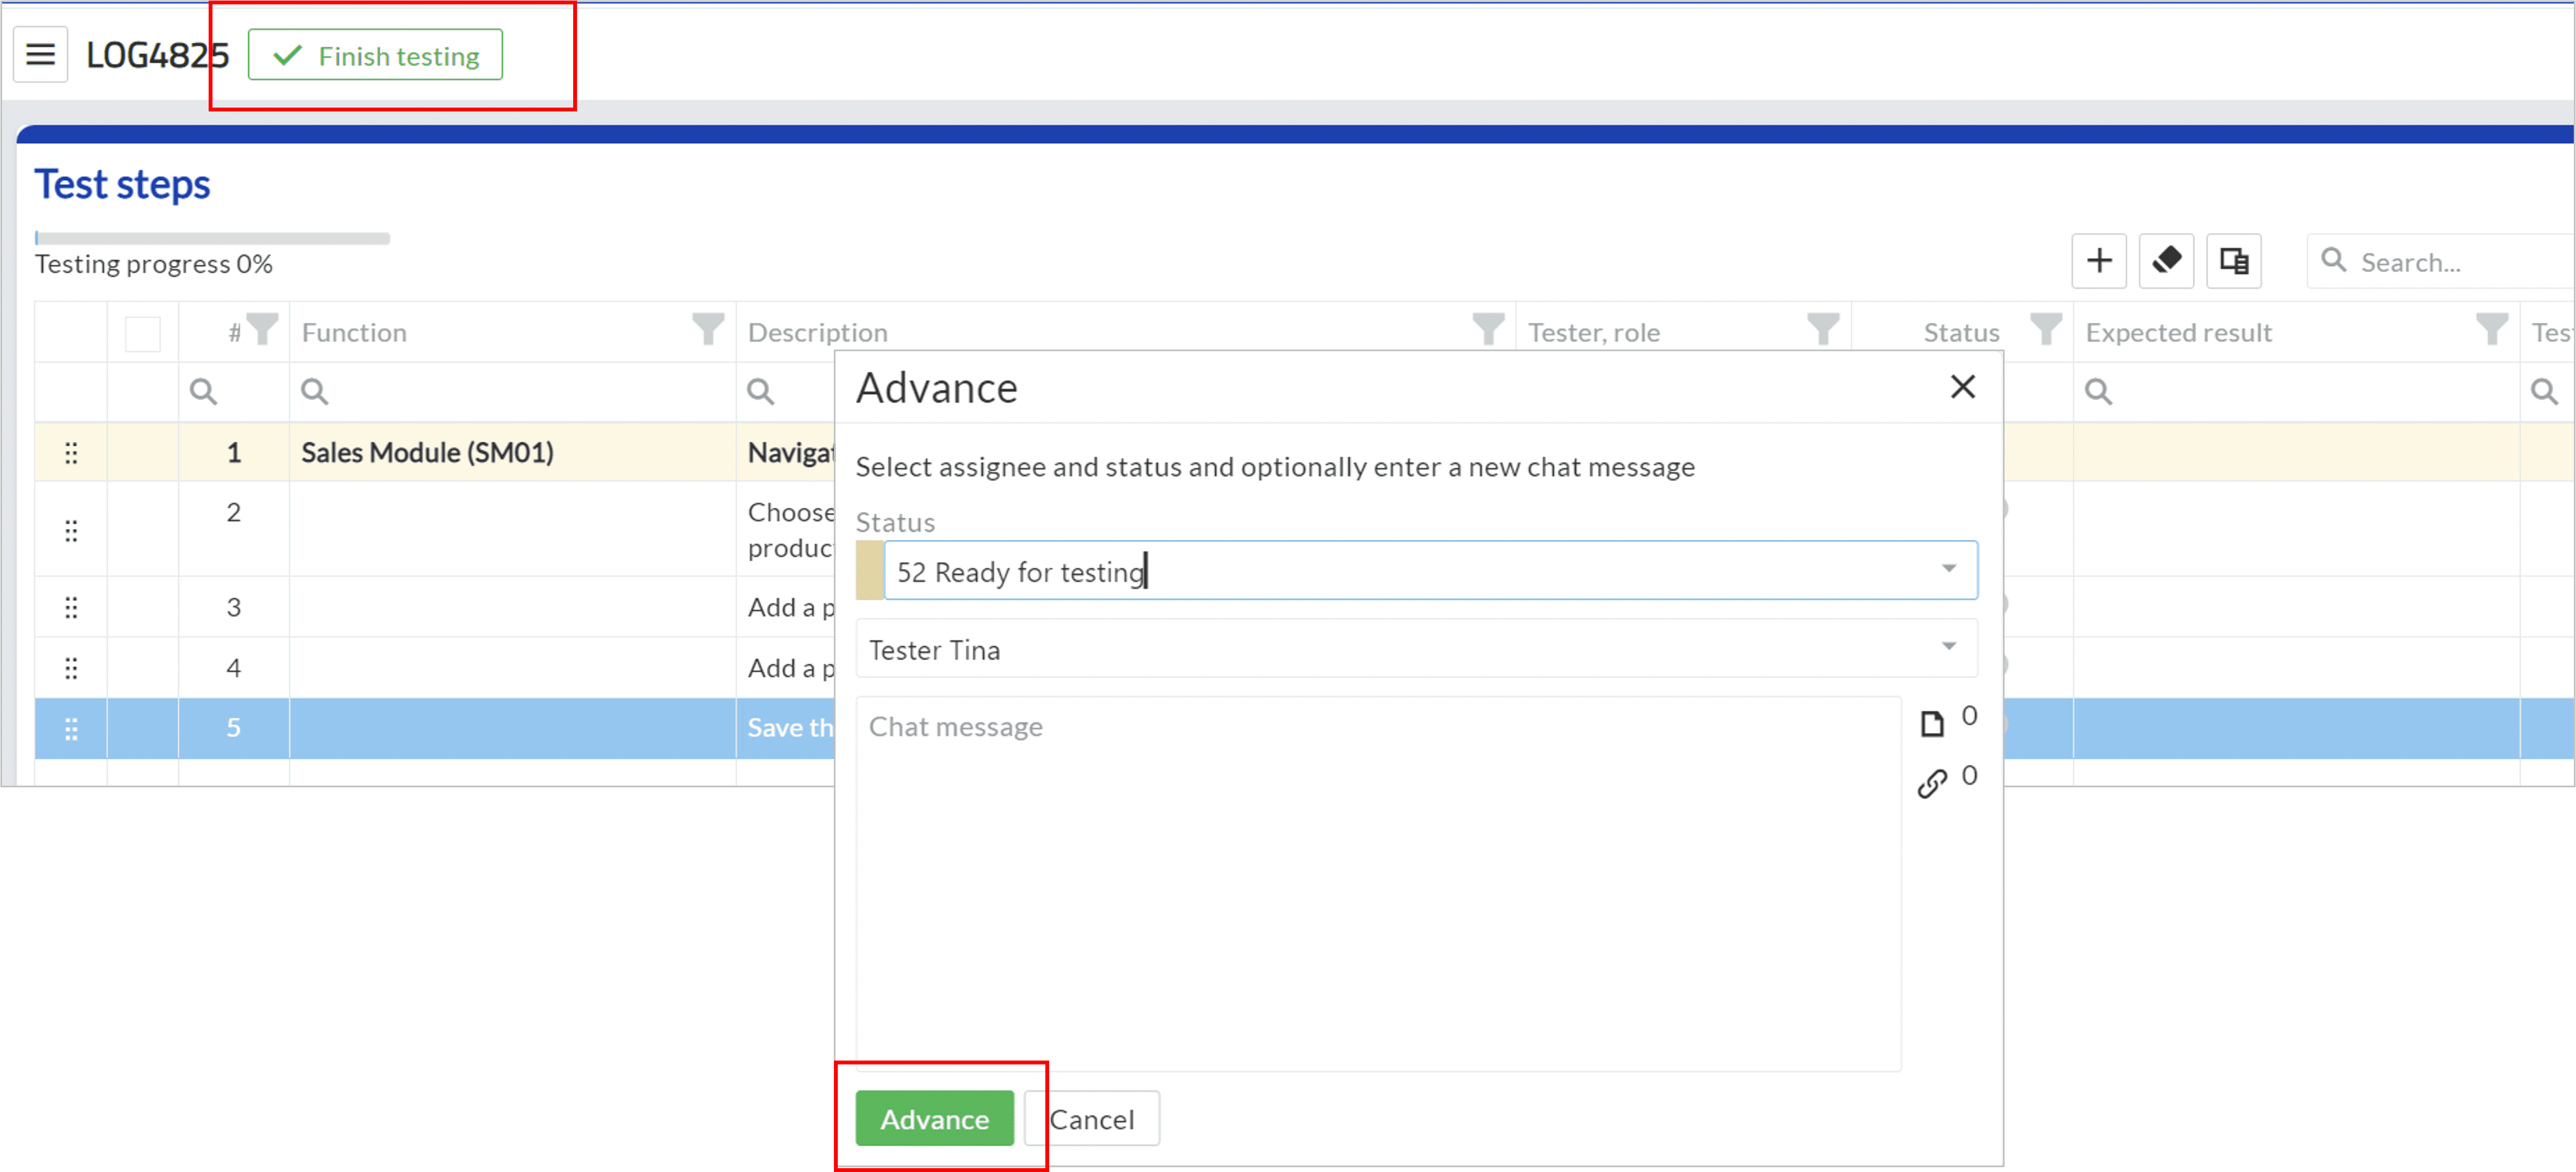
When the test rows are complete, click Stop Testing, edit the activity’s status, and assign a responsible person for testing.